How to Make a Glue Brush
This harpsichord maker’s tool works well for at-home crafts as well.
In the shop I use hot hide glue – almost on a daily basis. It is the literal thing holding together most of the work I do, from repairs and restorations to new construction of musical instruments, and the same holds true for our cabinetmakers. Hot hide glue, one of the oldest glues in existence, is a protein-based gelatin adhesive rendered from the hides/bones of larger mammals, rabbits, or fish to make a water-soluble glue.
Whether you've been clued into the awesomeness of working with hot hide glue, or you still prefer working with other adhesives, you’re going to have to apply it somehow. We sing the praises of hide glue regularly in the Hay shop, but it doesn't often come up as to the tools we use to apply said adhesive. The glue pot's material composition is important, and so is the composition of the brush itself.
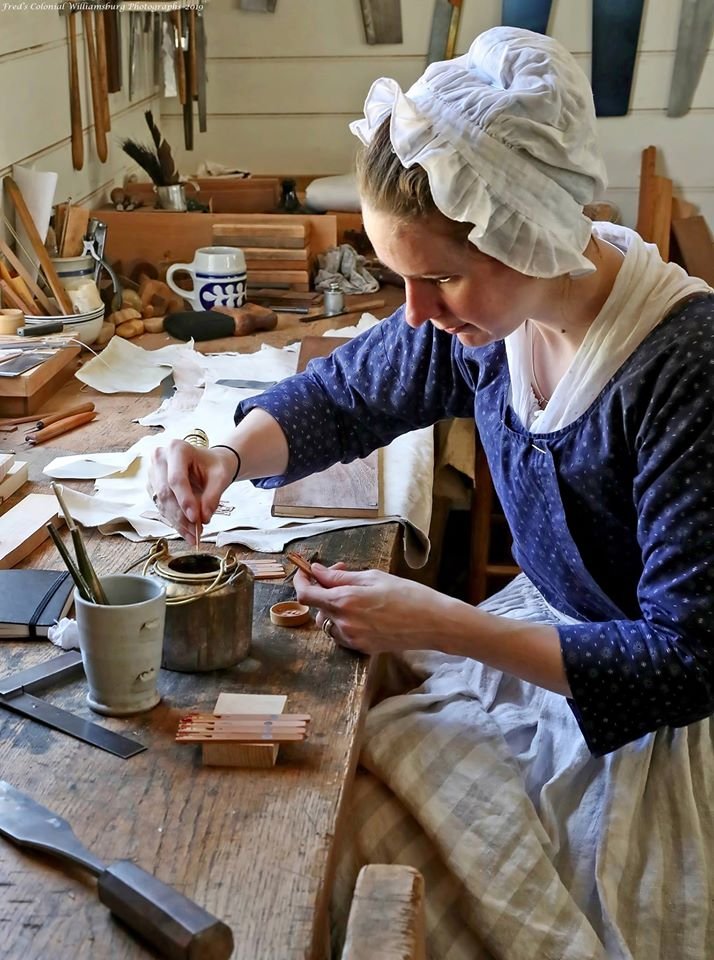
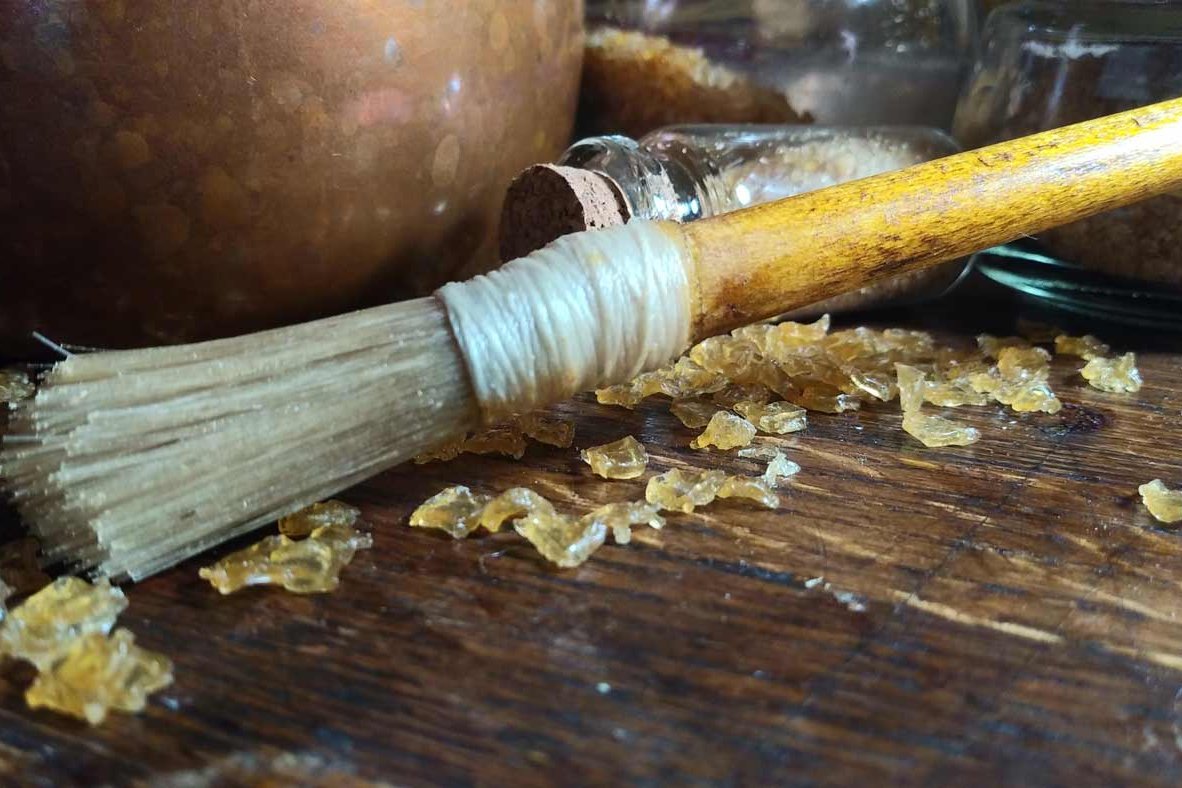
Photo courtesy of Fred Blystone
With a glue brush it is preferable to have firm, but still flexible, bristles. Natural is better. Boar’s hair or horse hair are ideal for this. Now, as I'm also a violin maker, access to horsehair is not a problem. Rehairing bows means I always have horsehair at the ready. A metal ferrule is also an issue on most commercially available brushes. Whether an artist's brush or the inexpensive throwaway shop brushes, the metal can still interfere with the glue (and those stray brush hairs that fall out and always get in the glue and are impossible to get out ... but, I digress). The material of the handle matters too. Those little metal ones rust, and rust and glue don't play well together either. So, what's a girl to do?
You can buy glue brushes from specialty suppliers who carry some lovely commercial options.
A variety of sizes with natural bristles and twine wrappings are available.

There are also these neat things:
From the limewood or linden tree, lindenbast brushes are ideal for the application of hot-setting adhesives and for the cleaning of glue joints. The bast fibers (“bristles”) are stiff, very resistant to wear and can be shaped using a chisel for very precise application of the glue. When the head becomes worn, new bristles can be produced by hammering apart the linden fibers at the end of the handle. Specialty suppliers will occasionally offer them for sale.
Sometimes you just make your own. It doesn't take long and you can check one of those nagging little projects off your to-do list while you're at it!
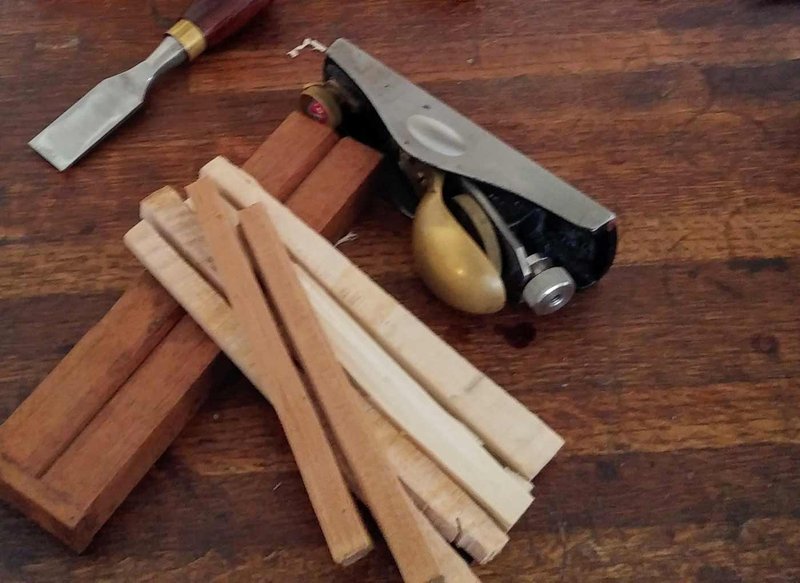
First, you'll want to find some scrap wood of a good brush handle size, about 7 inches long and 3/8” wide. Preferably a wood that won't interfere with your glue, if we're being fussy. I'd avoid walnut, oak, and the like since they have the potential to release tannins/toxins. Something like poplar, maple, beech, whatever you have handy will do nicely.
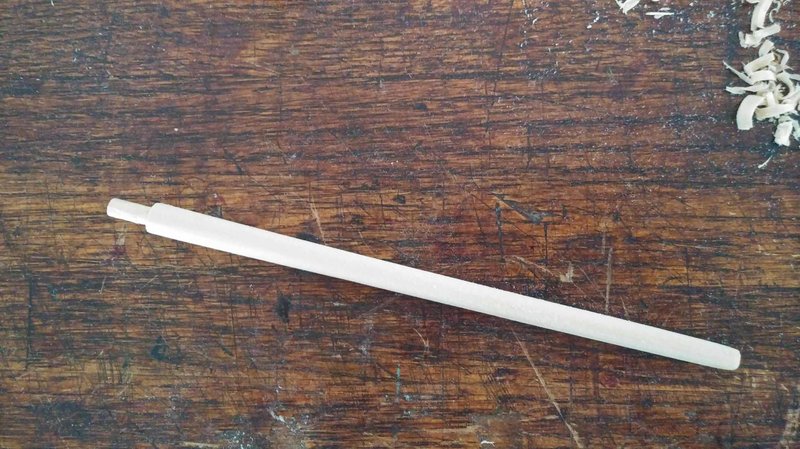
Once gathered, you'll need to shape your selected material to make a handle. I used a soundpost making jig I had handy and a standard block plane, then moved to a medium sized finger plane. Finally, I smoothed the handle with a file, then with sandpaper. You can use a spokeshave/drawknife to accomplish the same thing. The goal is to have a handle akin to the handle of an artist's paintbrush.
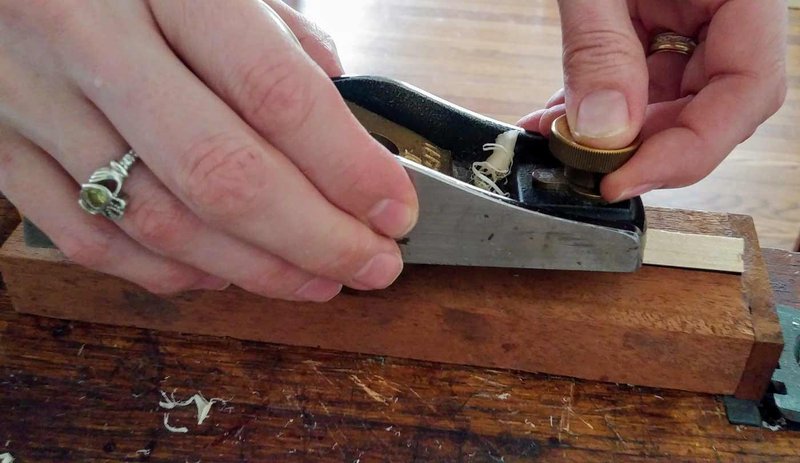
Next, you'll want to make a cut-away at the end of the handle to wrap the bristles around. I did this by making a stop cut at 3/4” from the end, all the way around, and then chiseling wood away to leave a little “shelf” to wrap hair around.
From here, you’ll want to prepare your bristle material and wrapping. I used horsehair — it’s what I have here. Boar's hair works well too. I've seen folks who've used inexpensive, natural bristle paintbrushes from big box stores and just removed the hair to use. That would work well too.
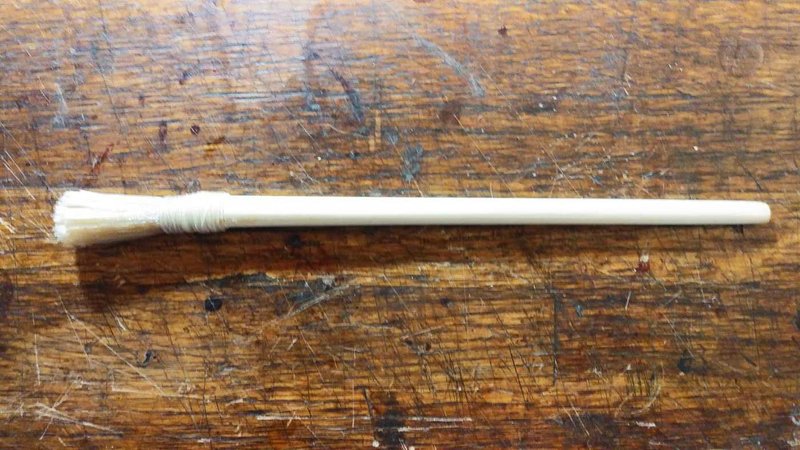
For wrapping, I used a cotton thread I have a bunch of here. Cotton cooking twine works very well and I've used that in the past. That was getting low and my resident chef asked me very nicely if I had something I could use...I like eating good food, so I obliged. Anyway, any good twine should work nicely, bonus if it's not synthetic.
Secure a section of hair around your cutaway. Tie this down and do several wraps, enough to meet your handle material. I then do a second, slightly shorter, layer so I can trim to make a rounded brush head. I knot the twine and wrap to secure.
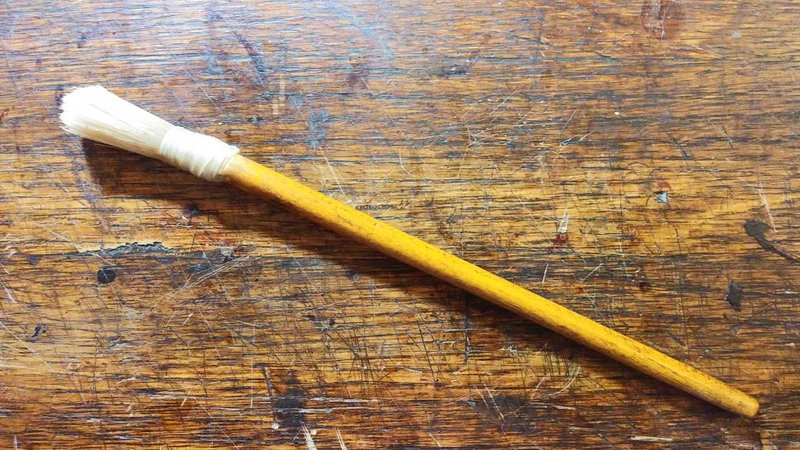
Once the wrapping is finished and knotted off, I brush the wrapping thoroughly with hot hide glue. After the glue dries, you can come back and trim the brush to shape.
Optional: Seal the handle with finish of choice. I had some light amber colored retouch varnish handy, so that's what we got for this one.
Now you're ready to glue!

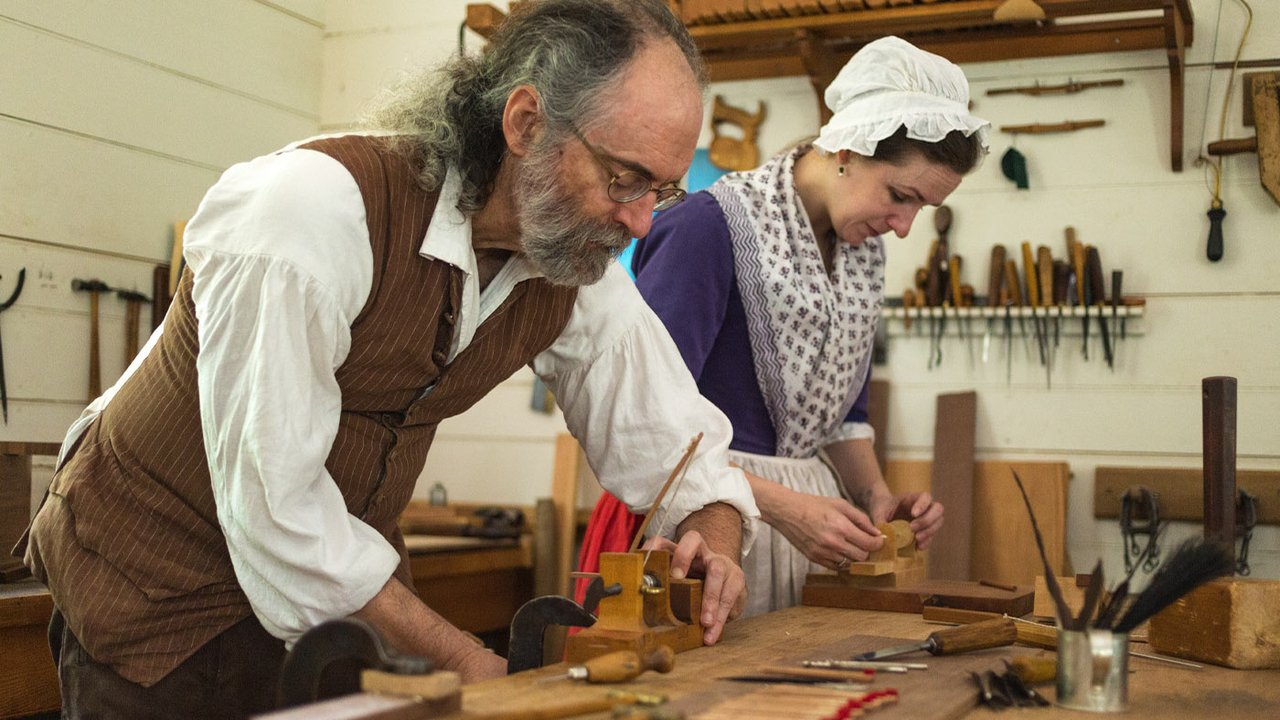
Melanie Belongia is the Apprentice Harpsichord Maker in the Anthony Hay Cabinet Shop. She is a veteran musical instrument maker, with several decades experience as a professional violin maker and restorer. She went to the North Bennet Street School in Boston, MA and The Hartt School of Music in Hartford, CT. She and her husband William enjoy performing together as musicians and spending time with their family.
Cabinetmaker & Harpsichord Maker
Watch expert woodworkers fashion the intricate details of luxury products with period hand tools. In the same workshop, visit the Harpsichord makers, specialized craftsmen who build stringed keyboard musical instruments that sound by quills plucking strings.